
Volantex Compass Robotic Conversion
Motivated by the desire for a compact, traditional sailing boat that I could easily chuck in the car and launch with minimal prep, I acquired a second-hand Compass Volantex DG65-class RC yacht. The previous owner had assembled it from a kit, but never quite finished the rigging. So, having completed that little task I took it out for a sail using the included 2-channel RC transmitter.
This test sail verified it behaved nicely on the water and gave me a sense of how it might behave after conversion to robotic control! The conversion would involve a few stages:
- Replace the original RC receiver and battery with a DroneLink motherboard, Power module and LiPo battery
- Rework the electronics bay to accommodate the electronics
- Replace the stock hatch with a new 3D printed hatch to house the battery and Compass module
- Integrate a GPS antenna and 915MHz dipole for the RFM69 radio
- Create a miniature wind vane using an AS5600 magnetic encoder
Overall layout:

New Brains
After removing the original electronics, I set about designing a mounting plate that would accommodate the original sail and rudder servos, a V4 DroneNode Motherboard and one of our Power Supply circuit boards:


The GPS antenna has a very short lead, so I decided to float it on a 3D bracket that sits across the hatch opening:


The hatch is a fairly simple shape, designed to be printed upside down with minimal support. It integrates a little finger notch at the back (for easy removal) and a nubbin at the front that locates into the hatch cutout:


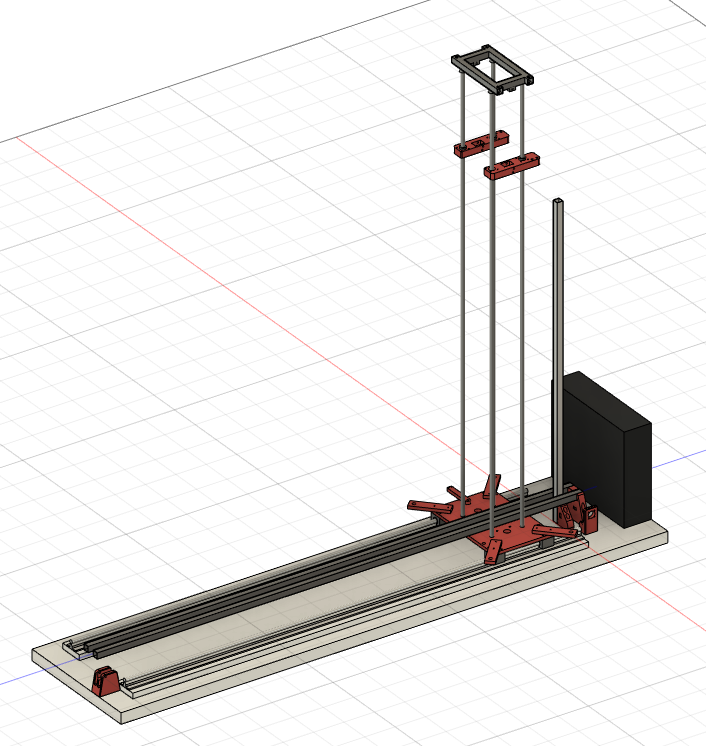
Wind Vane
The solution I came up with was a pair of lightweight printed truss arms mounted to a transom plate. Here's the transom plate and one arm shown for clarity:

The transom plate was glued to the back of the boat with Guerilla glue and then the truss arms were screwed on with M3 bolts.

The wind vane itself is sized around the popular AS5600 module you can find on eBay, Amazon, etc for a few pounds. The upper part of the wind vane housing contains a tiny bearing (MR84-2RS) and a bolt as a pivot. On the end of the bolt is glued the magnet.
The wind vane itself has an M3 bolt and a couple of washers screwed into the front end to balance it. The vane itself is a piece of 1mm clear plastic, cut and glued into the printed holder.


Performance
- The hatch seal doesn't work - the boat had at least an inch of water in (and yes, I remembered the drain plug)
- The wind vane tail is too small, when the boat is heeled it no longer catches the wind reliably
- The radio system worked well - we had connection to almost 200m with an omni-directional base-station antenna - hope to better data rate and longer range with the Yagi antenna tracker
- The CMSP12 compass appeared to perform very well during calibration and the first 10min of sailing, then it seemed to lose heading completely and by the time the boat was recovered, it had drifted by over 100 degrees. Extremely disappointing and must be resolved before we can sail again.
- The power system worked well - the tiny 860mah LiPo still had plenty of charge after an hour of testing and on the water sailing
- Sheet trim was pretty good
- Rudder response was good
- Downwind performance was better than expected - should update the polar to match (needs more of a rounded bum!)


Perhaps not easy to achieve: place the wind vane and as5600 assembly on an axis perpendicular to the axis of the sailboat just above the AS5600 housing with a counterweight if necessary below to cancel the list.
ReplyDeleteRather than a beautiful 3D print of the wind vane support mast, use 3 carbon tubes with spacers in cnc cut or 3D print
Better explained: rotate the current axis by 90°
Deletegood idea - a counter-weighted pivoting vane would be great and some carbon tubes would be lightweight / low drag
Delete